 What is Twitch?
Twitch is a website that allows users to stream themselves playing video games for the world to see! You may have seen the awesomeness that is ShinKaigan streaming Vainglory on Twitch and thought, wouldn’t it be cool to do that too? I want to be famous like him! Well, now, you can! (Fame sold separately).
Requirements
A Mac (dedicated GPU is recommended) (PC can stream, but not for this guide)
Mac OS X Yosemite Operating System
USB to Lightning cable
Internet connection with at least 1Mbps upload
Soundflower (free download)
Quicktime (free, included in Yosemite)
OBS (free download)
A Twitch account (free, sign up here)
Connecting your iOS device to Quicktime
Plug your iPhone / iPad into your Mac via lightning to USB cable. Avoid USB hubs as sometimes this can cause problems. Open QuickTime Player, located in your Applications folder. Go to File, New Movie Recording. Your internal camera will likely be shown in a window. Click on the down arrow next to the big red record button.
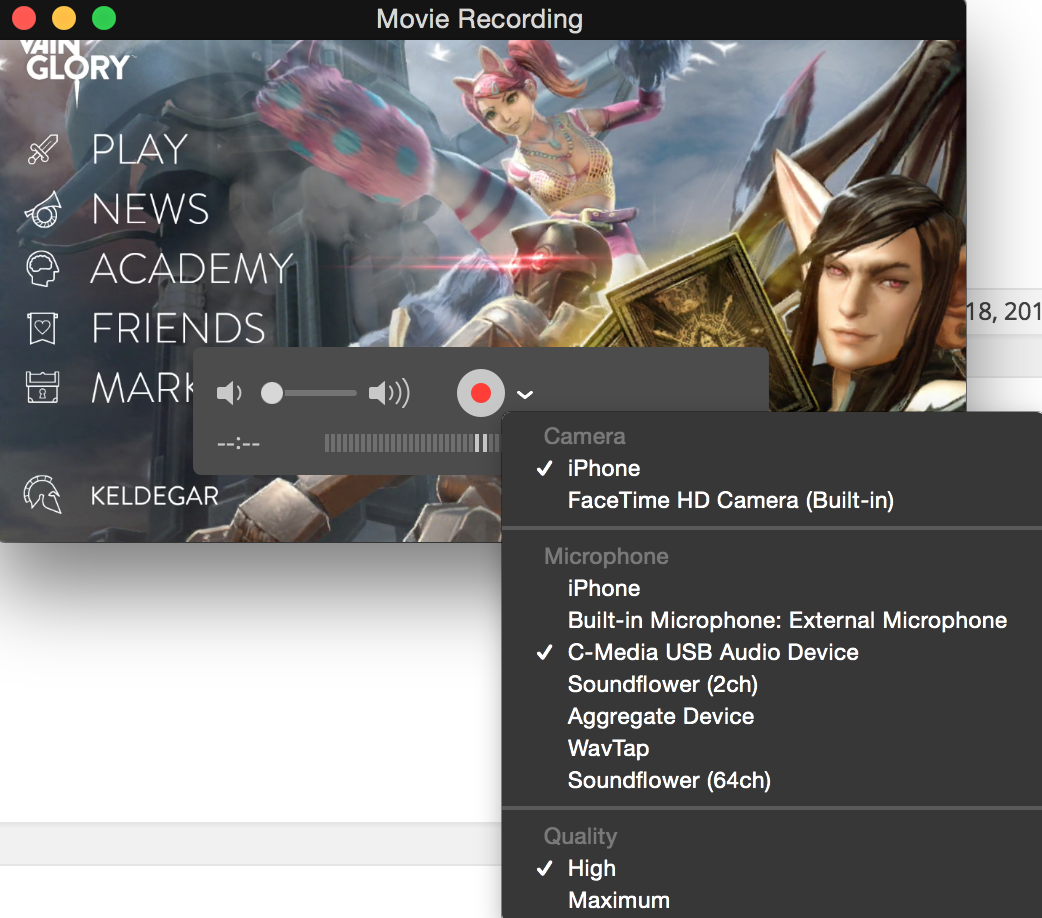
Make sure “Camera” is set to iPhone, and Microphone is set to “iPhone” if you would like game-audio. Another thing to check is that volume slider in the photo. If it’s all the way down, there will not be any game audio. Lastly, make sure your “vibrate” switch isn’t on. Again, you will not have in-game audio if the ringer is turned off.
Configuring Soundflower
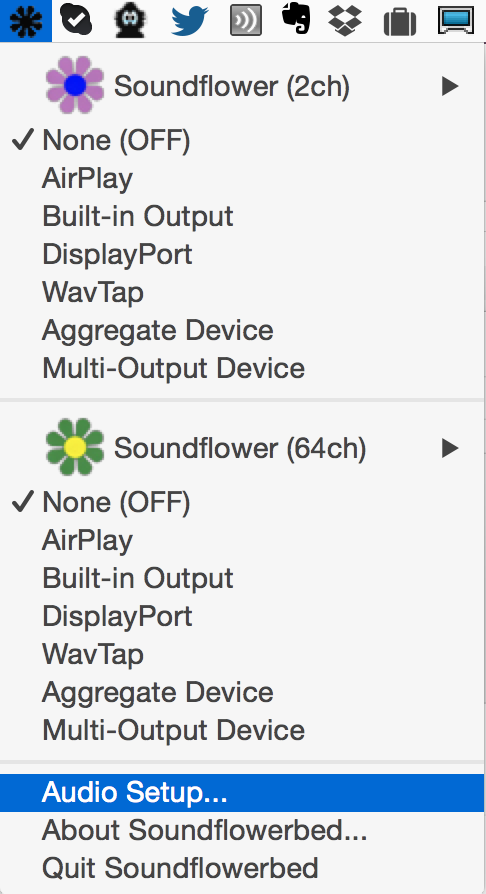
Next, we are going to configure Soundflower so that we can route the in-game sound to both OBS and your headphones. Install SoundFlower from the above link. When you launch it, a menu-let will appear near the clock / wireless / volume controls of the menu bar. Click on the black flower drop down and go to Audio Setup.
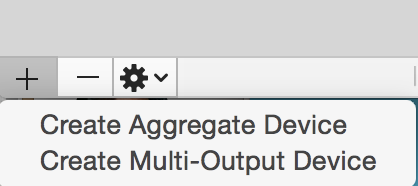
In the Audio Setup window, click the + button on the bottom left and select “Create Multi-Output Device”.
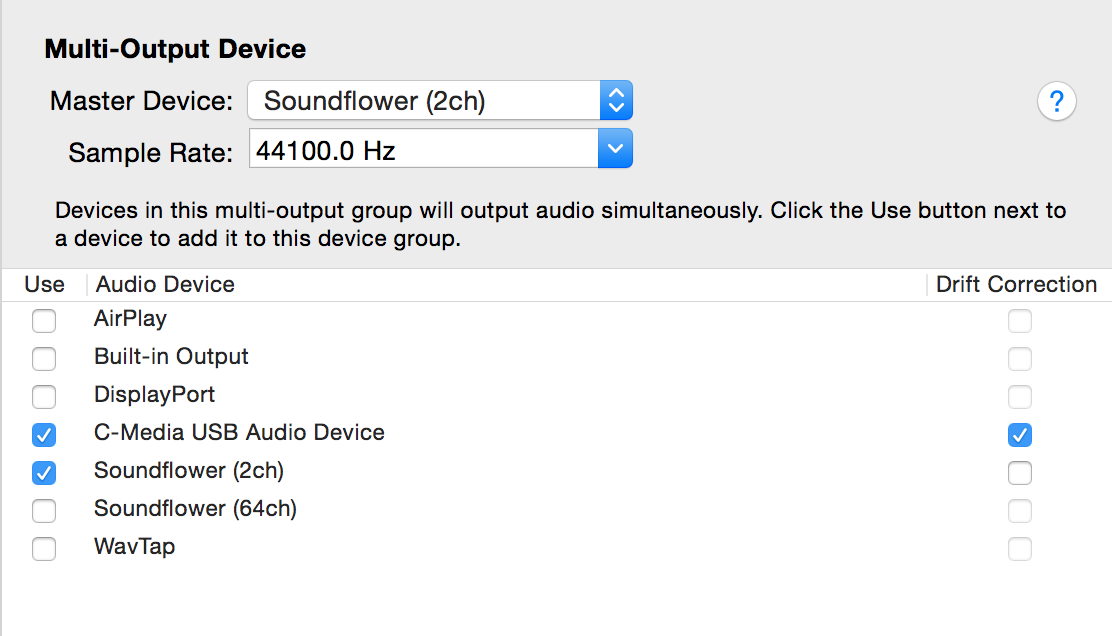
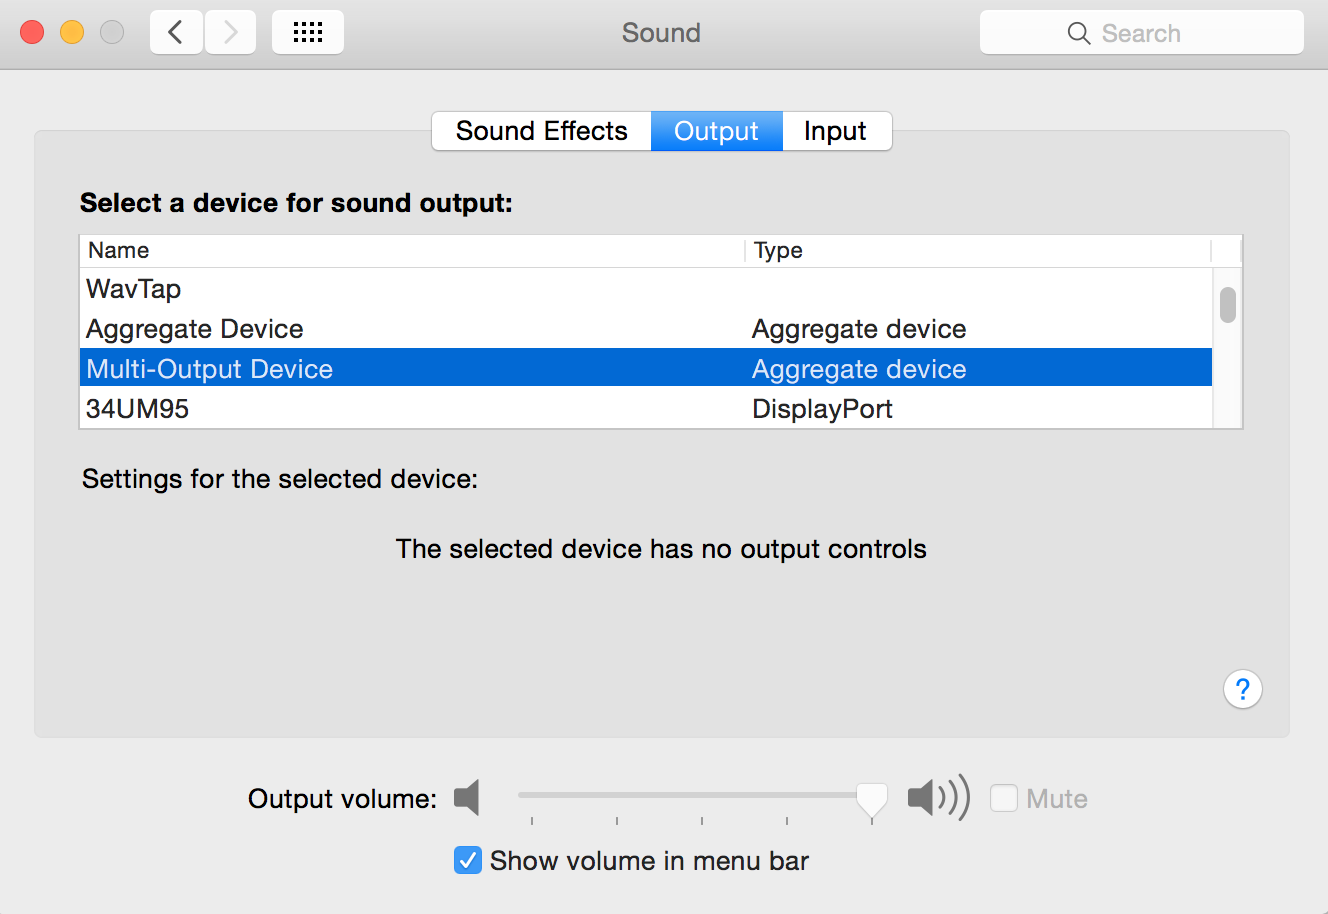
Highlight your new “Multi-Output Device” and on the right hand side, select your headphones (built-in Output) or in my case, C-Media USB audio device. Also select Soundflower (2ch). Now your audio will get sent to both OBS and your headphones! In order for your Mac to use this new Multi-Output device, you must select it in System Preferences > Sound > Output.
Configuring OBS
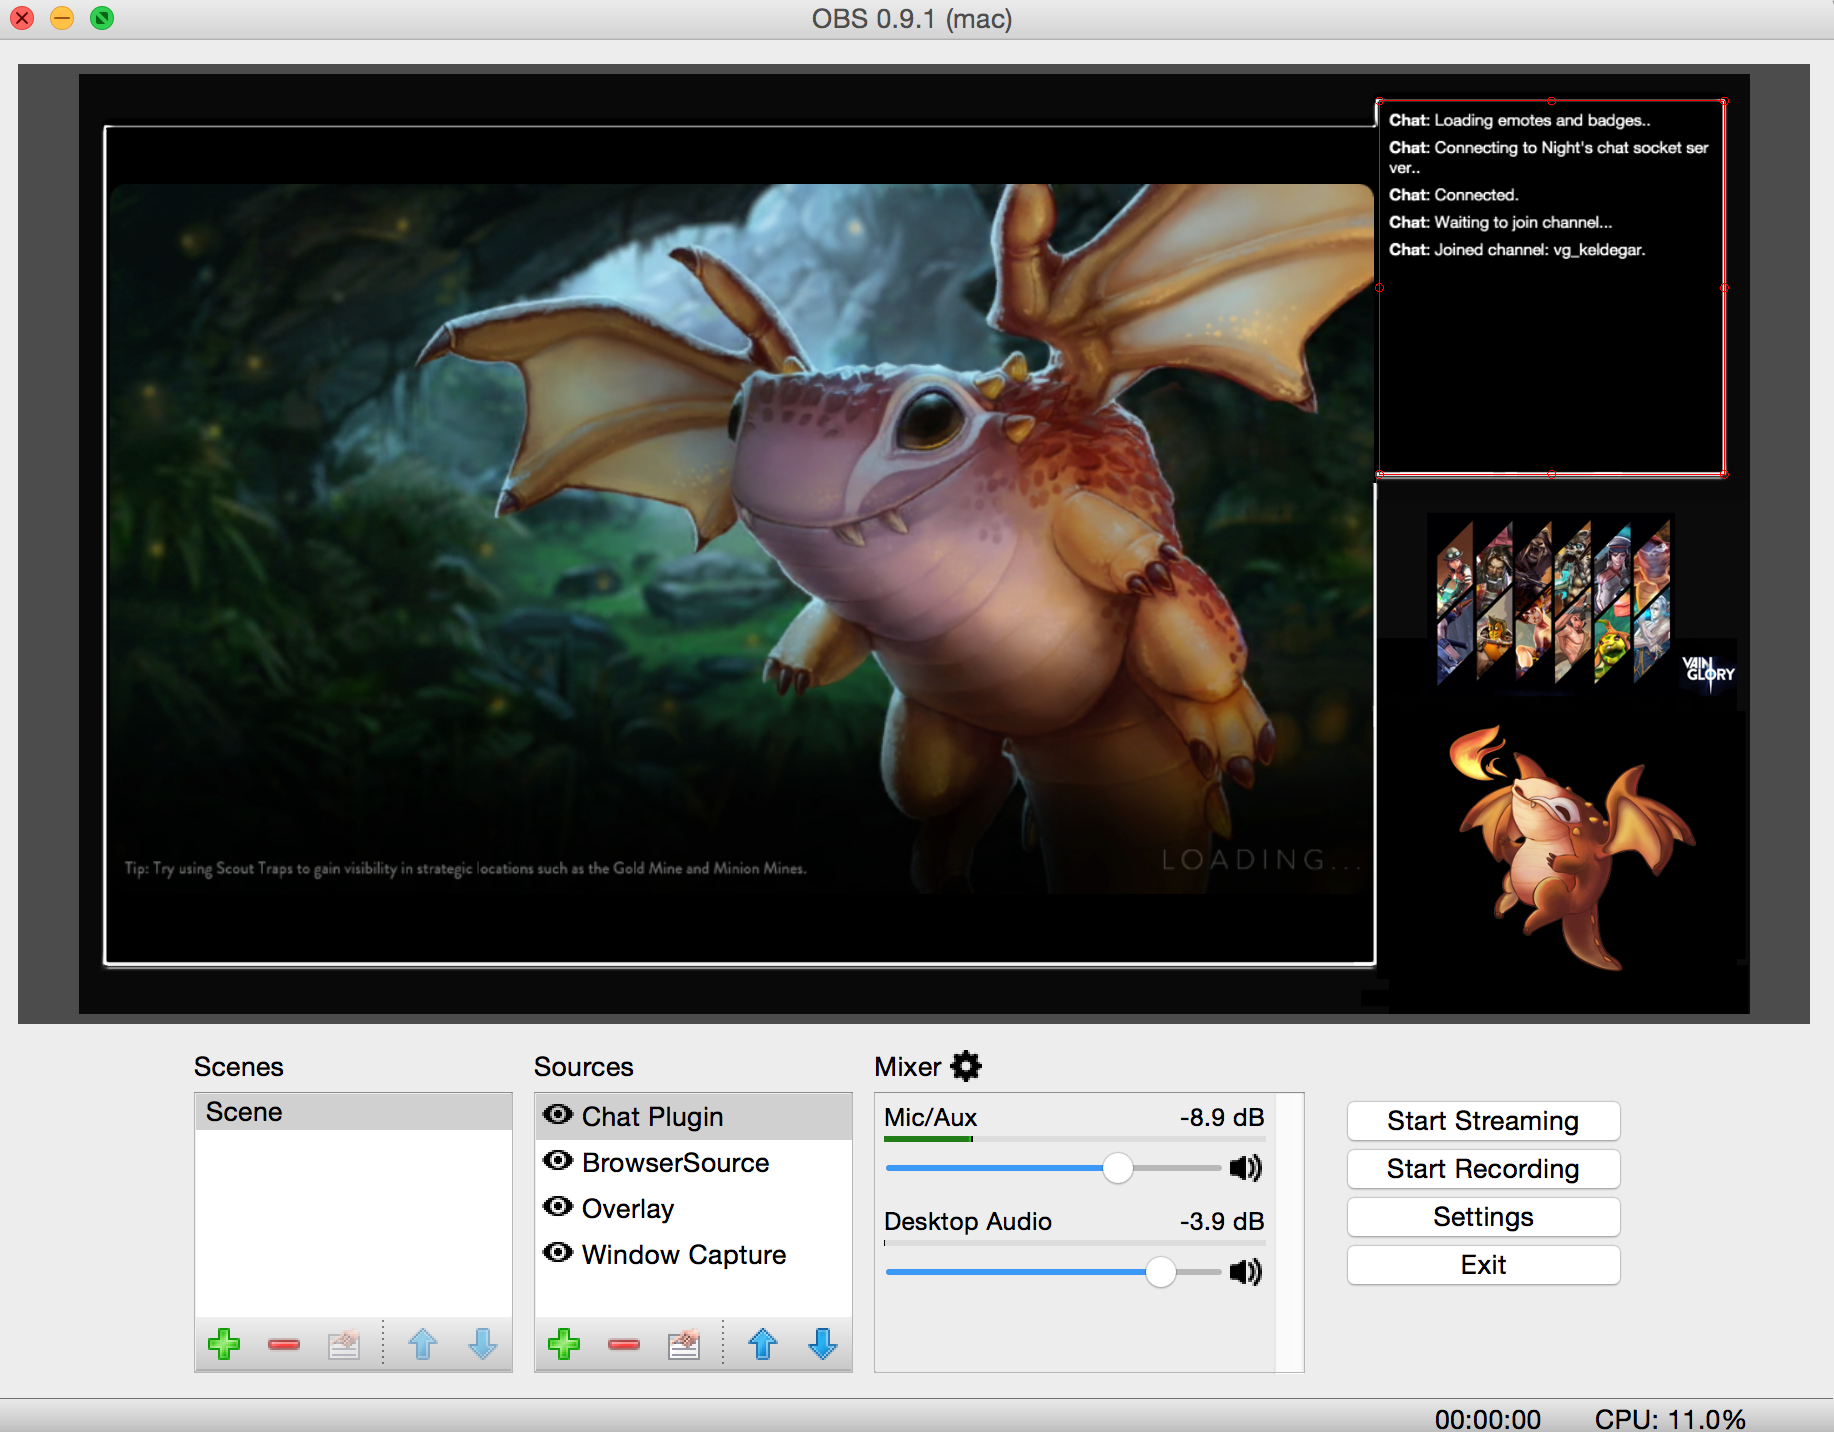
This is the OBS interface. The black portion of the screen is what streams to Twitch. We can make this fancy by adding an “Overlay” window with a graphic. Overlays should be the same resolution and dimensions you want to stream. For my stream, I use a 1920×1080 overlay.
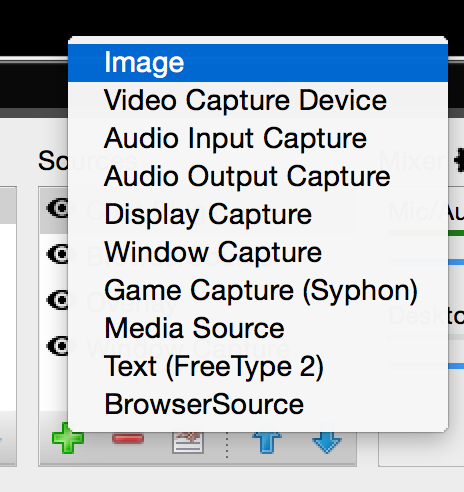
Click the green + button in the “Sources” section. Select “Image”. Browse for the image you would like to use.
Next we need to import our game feed from Quicktime. Click the green + again, this time selecting “Window Capture”. From the Drop down menu, select “[Quicktime Player] Movie Recording”.

The game feed should drop onto your overlay. You can resize and reposition it to fit your overlay window.
Now we need to configure our settings for streaming. Click the “Settings” button in the main window. These are my Output settings.
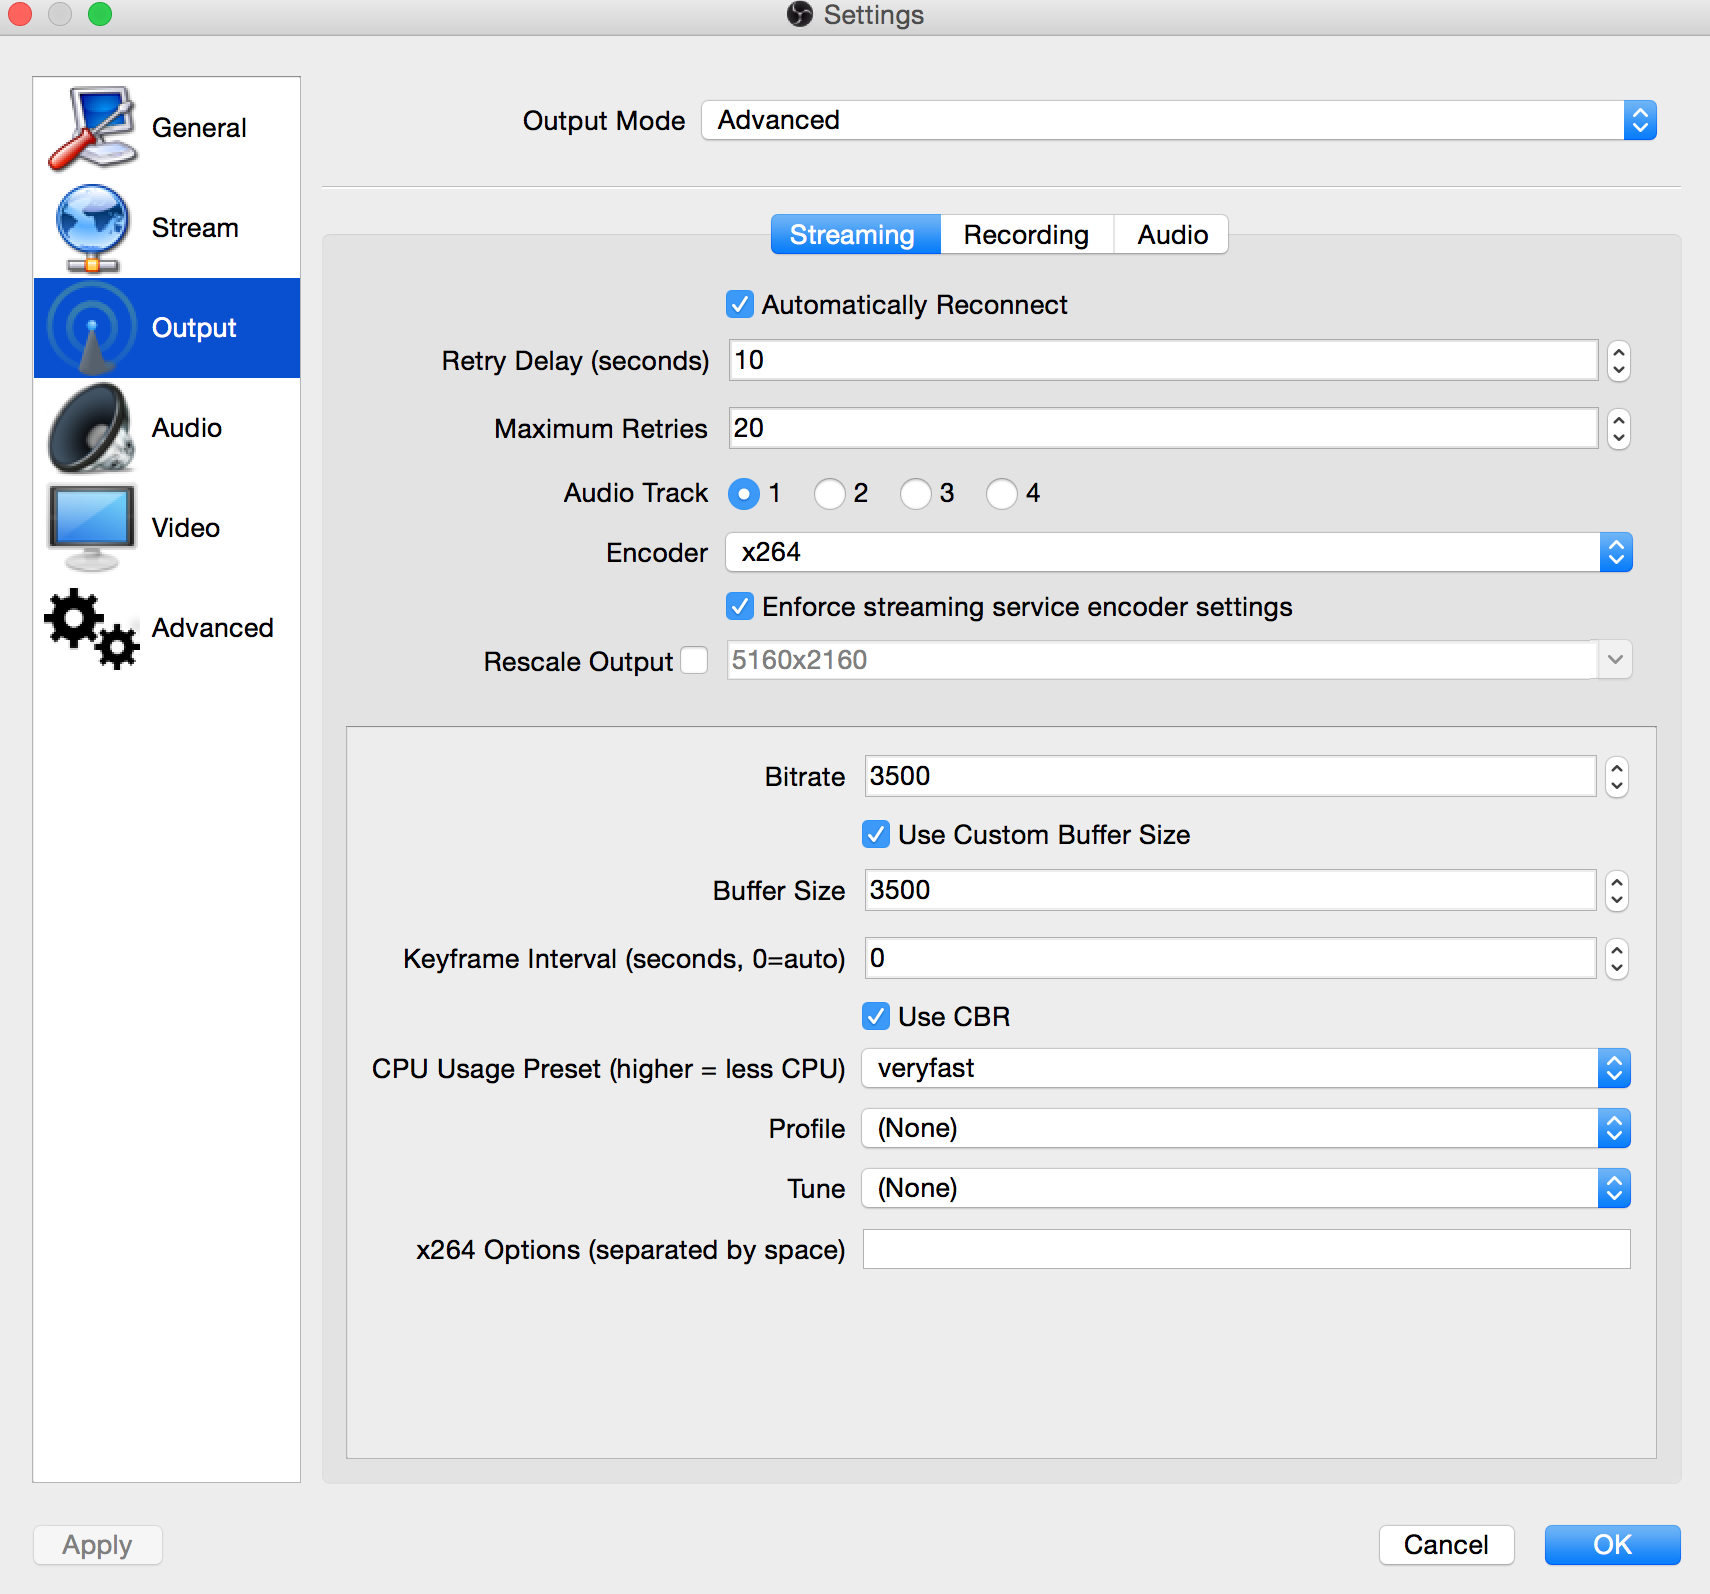
I have a fast upload (350Mbit) so I use a 3500 bitrate. If you have a slow upload, you may want to lower this number. ShinKaigan has a 1Mbit upload so he uses 1300. I left CPU usage to the default “veryfast”. I’m not sure how this affects the quality of the stream.
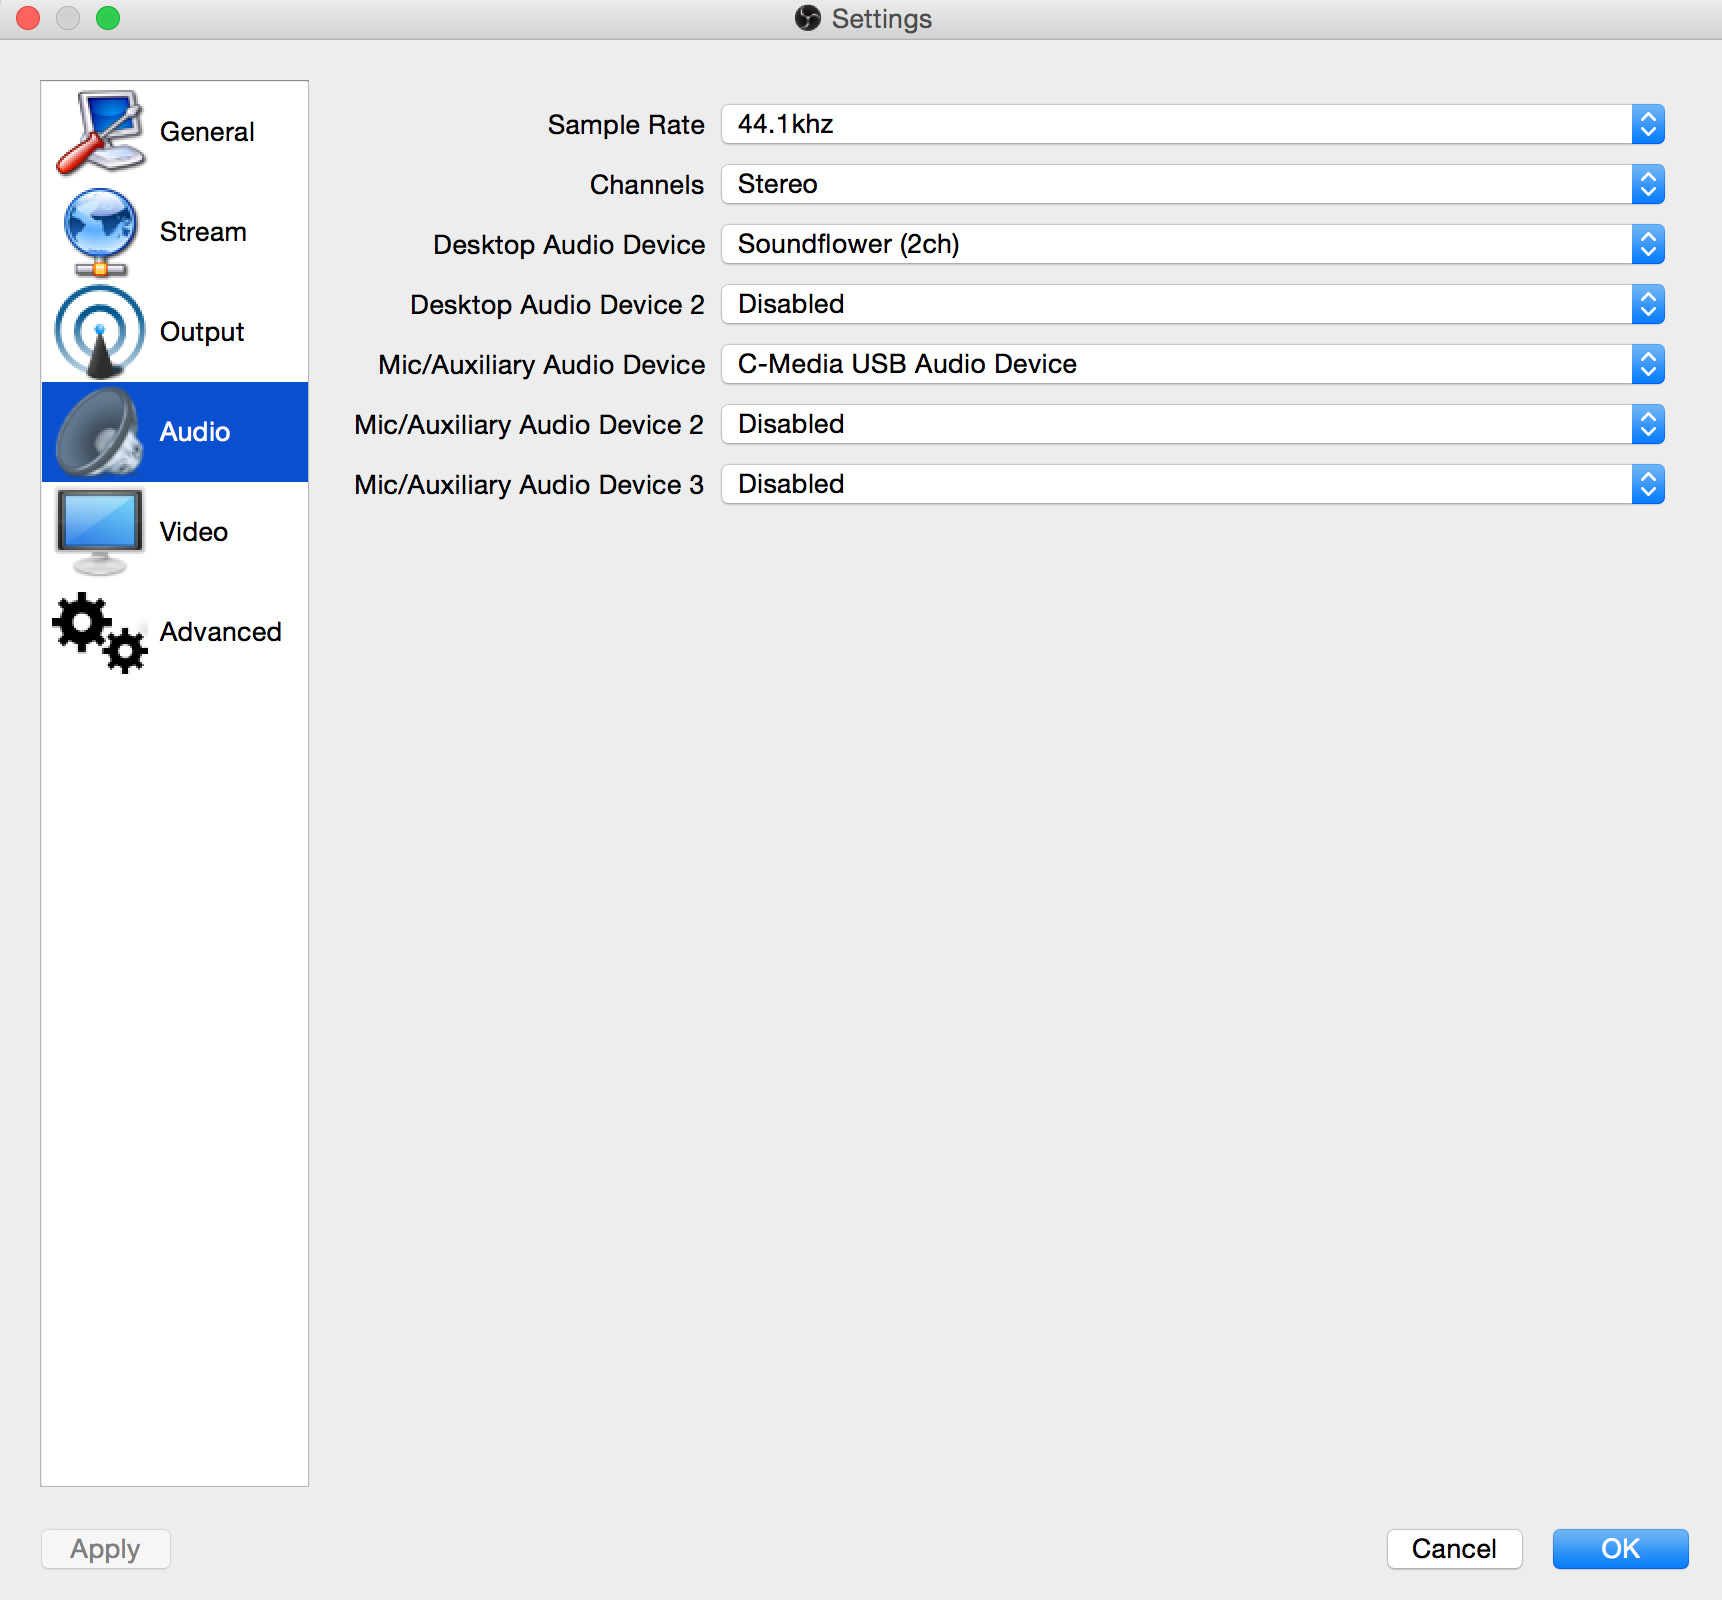
For the “Audio” section, make sure “Desktop Audio Device” is set to “Soundflower (2ch)”. Then make sure your “Mic/Auxiliary Device” is set to your microphone (Built-in input or USB Audio device).
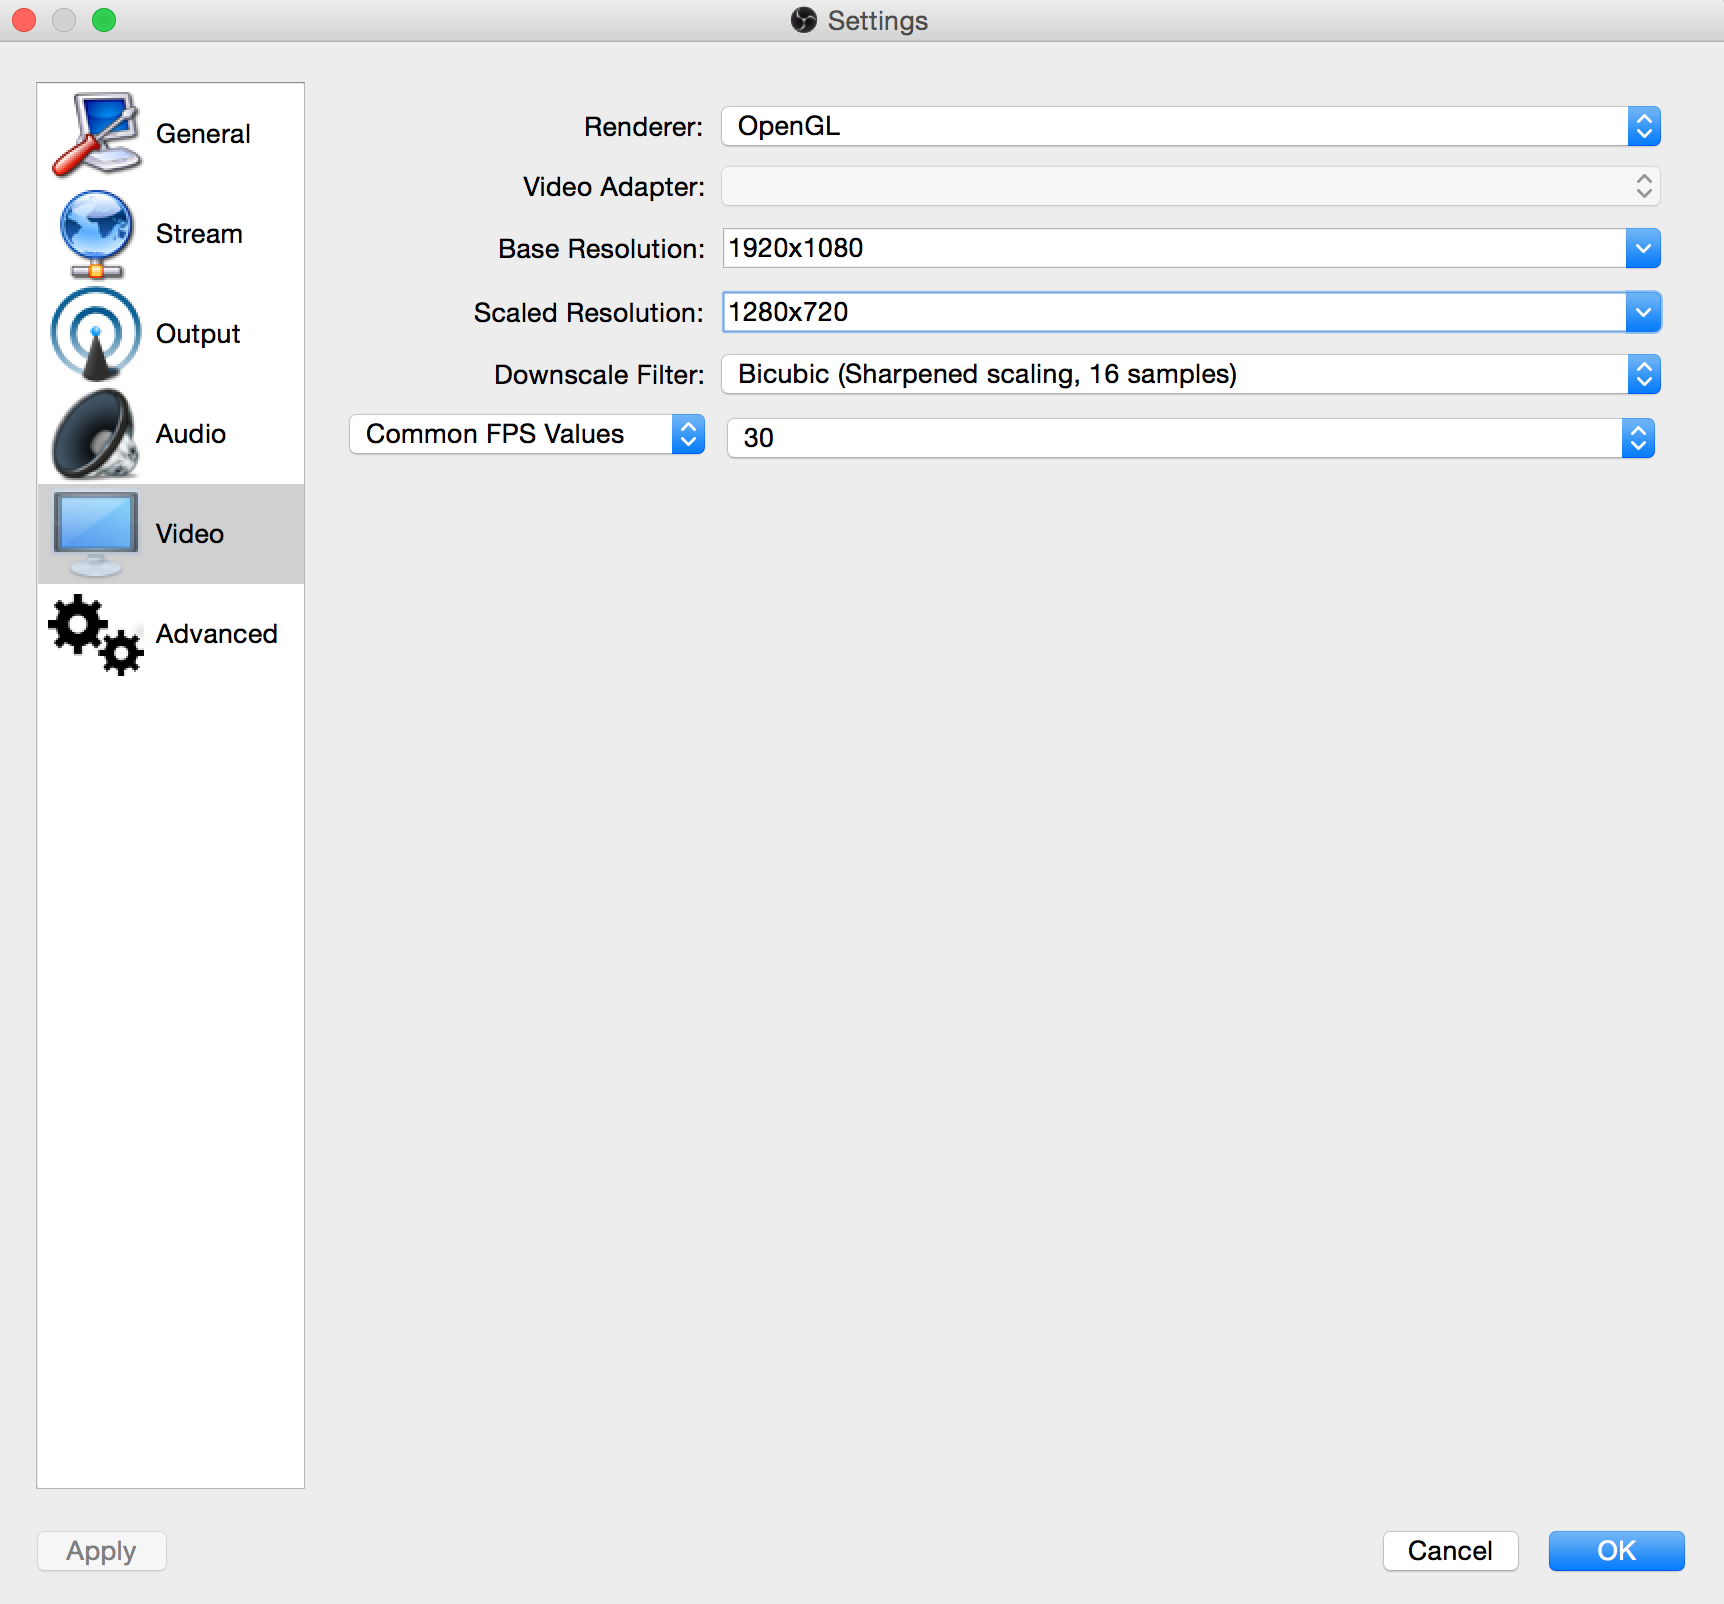
These are the video settings that worked best for me. Your “Base resolution” will greatly affect the speed at which OBS can render. Make sure if you have a Retina-enabled Mac, to lower your base resolution. Next, set the “Scaled resolution” to 720p (or lower if you have a slower graphics card). I am running a 27″ iMac 3.4Ghz Quad i5 with Geforce 775M. Lastly, I selected “Bicubic” as my filter. Why? Because ShinKaigan said to!
Connecting OBS to Twitch
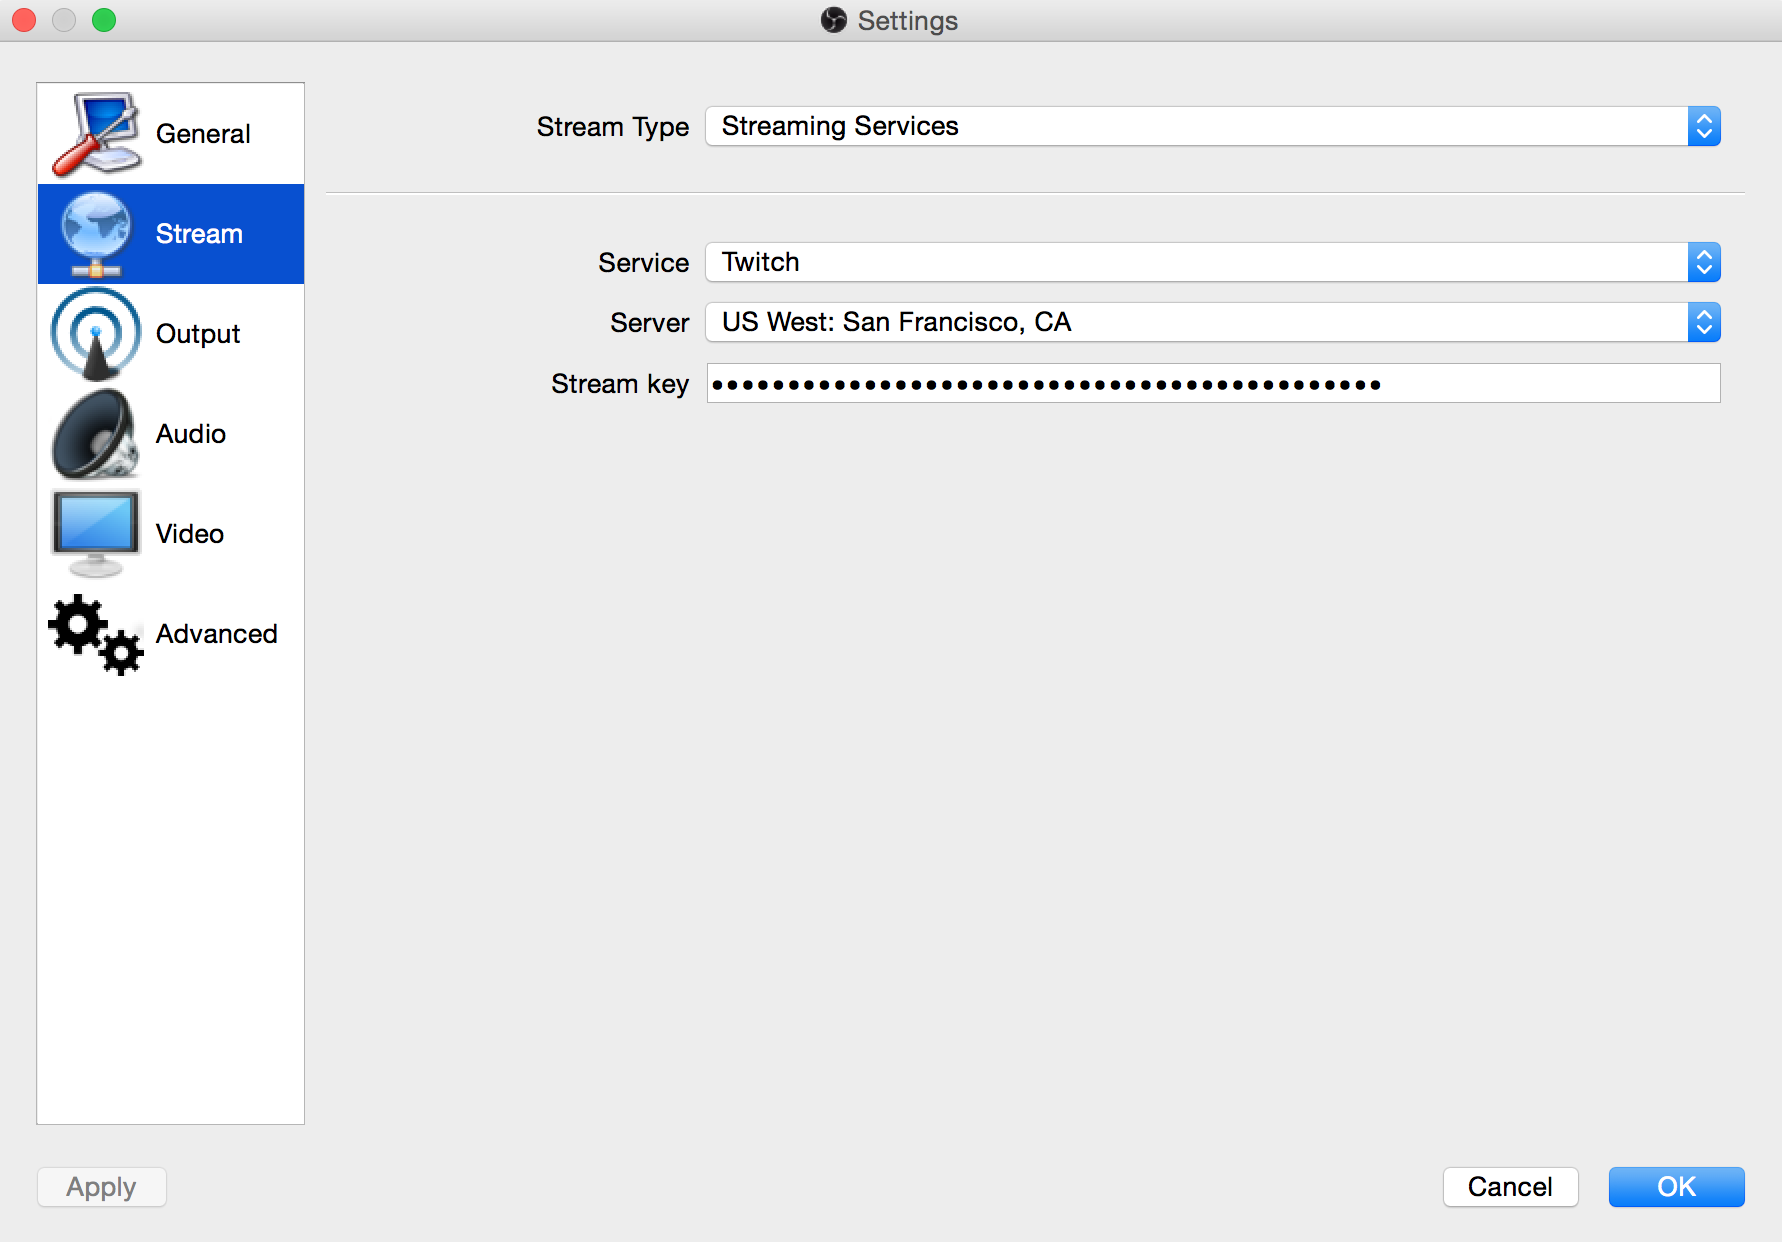
Go to your Twitch dashboard. Click “show key”. Copy and paste this into the “Stream key” field of the “Stream” tab in OBS settings.
Connecting Chat Plugin
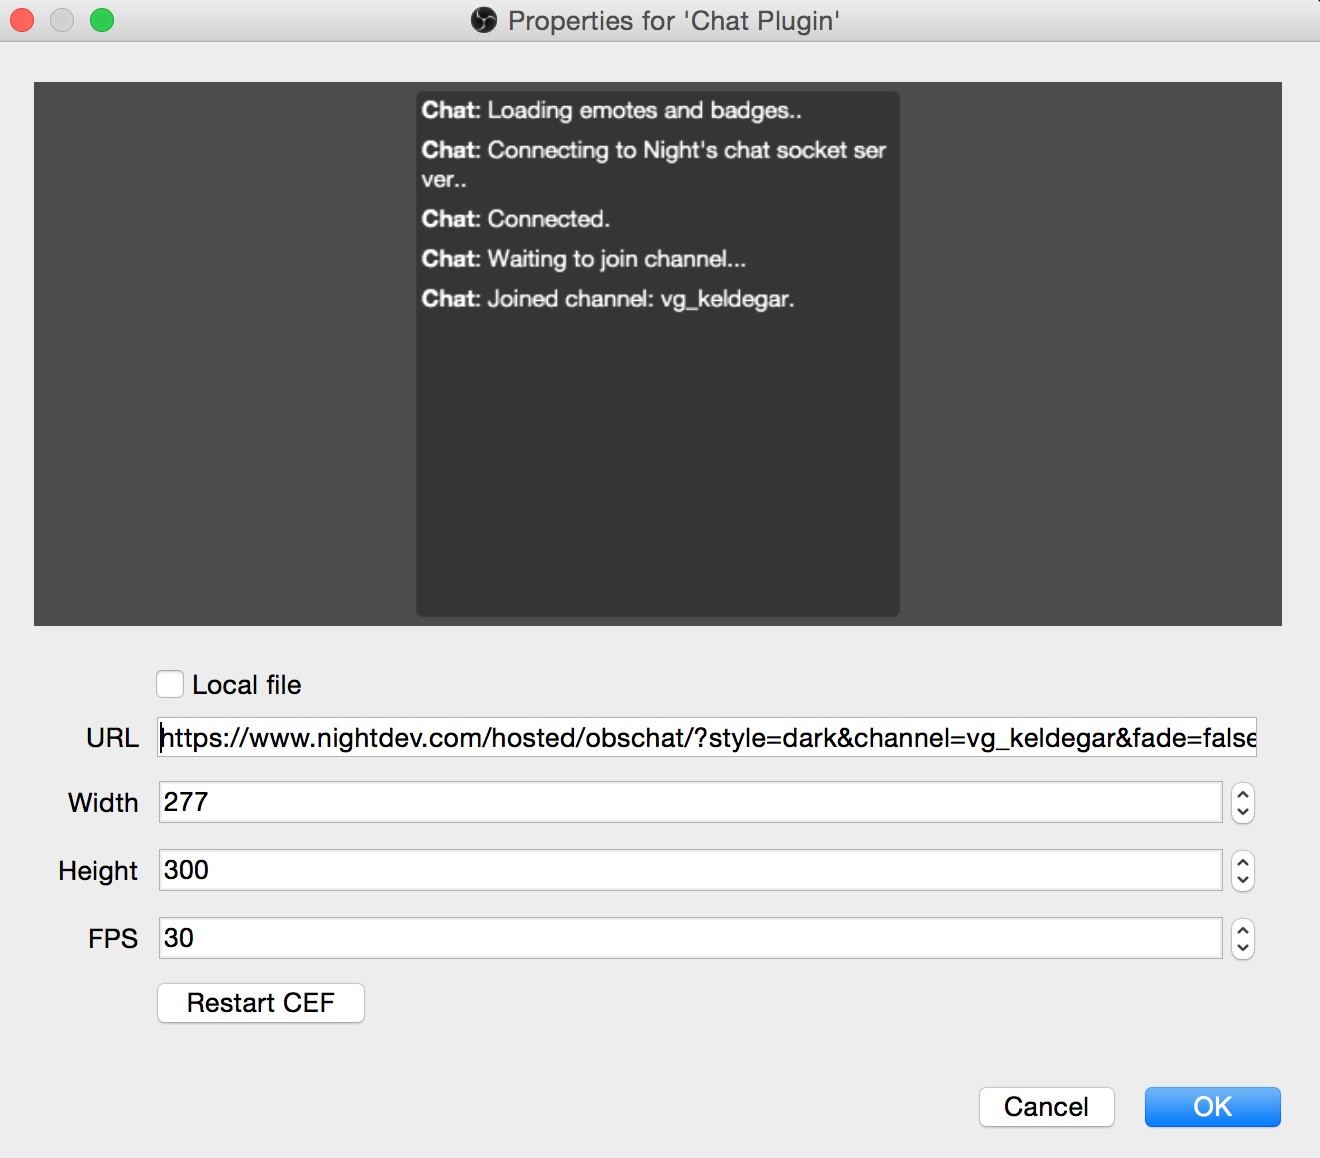
Download and install the OBS CLR Browser plugin. Then go to https://nightdev.com/obschat/. Click the green INSTALL button. Skip the download (it’s for PC) and click “Next”. Follow the on screen instructions. At the end of the wizard, you will get a link to copy and paste. In OBS, click the + button under “Sources”. Select “BrowserSource”.
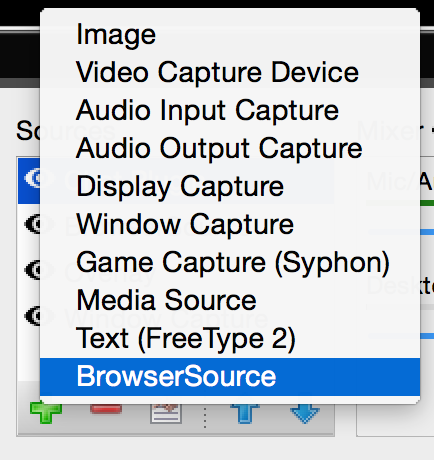
Copy and paste the obschat link into the URL field. You can manually adjust the height and width of your chat window. The smaller pixel size you use, the larger the text will be. You can position and resize this window on your overlay.
Connecting the Twitch Alerts Plugin

Go to http://www.twitchalerts.com/. Click on the “Launch Twitchalerts” button. It will ask you to link to your Twitch account. On the left navigation, click on “Alert Box” under “Stream Widgets”. Set up the alerts how you want. Then copy the link that’s in the input box under “How to”.
In OBS, click the green + button and select “Browser Source” again. Paste the URL into the URL field. Position it how you would like. To see how it looks, go back to the website and click the “Test Follow Alert” button.
Other Useful Tips
Put your device into guided access. This will prevent text messages, phone calls, and embarrassing photos from creeping into your stream. Don’t login to your account while streaming! Passwords show on screen!
Go Stream!
Do it! Click the button! You’re now LIVE on twitch!

8 Comments
str8upjack
Aug 10, 2015 2:55 pmI have major issues using quicktime and soundflower together and hoping you have a solution. The audio from my game ( World Of Tanks Blitz in my instance ) becomes corrupted when using sound flower. The audio pitches up and down, drops out or “robots” throughout the broadcast. Turning off sound flower and setting system sound preferences to using only builtin audio eliminates this, but of course that means I can’t combine all my audios for a stream.
Any thoughts on this? Experience this yourself?
keldegar
Aug 10, 2015 3:06 pmI haven’t experienced this myself. What I would test is how the audio sounds in quicktime (without OBS or anything). Is it messed up?
Are other games messed up or just World of Tanks?
I used SoundFlower 1.6.6, perhaps there is another version you might be able to try, or reinstalling Soundflower?
KLUNE
May 24, 2015 11:51 pmMice article but I wish that stream to Twitch would be easy as stream Asphalt 8 directly from the device.
TheHotmessVG
May 23, 2015 3:33 pmGreat article, Keldegar. Got some great tips from here to improve our own stream.
A couple of questions for you:
1.) Is it problematic to set your stream rate too high? I’m doing alright with 1280×720, 48fps, 2000Kb. I can go higher, but I’ve heard that this may make it difficult for viewers with slower connections to receive the stream. I didn’t know if Twitch scaled down the stream for slower connections or not.
2.) Our game audio is in sync, but our webcam audio seems to precede picture by about half a second. From what I’ve seen on the internets, this is an issue with Mac OBS, but PC OBS allows you to manually set audio delay. Any word on when audio delay will be implemented for the mac?
AdyEndrus
May 23, 2015 3:44 pm1) Yes. Twitch only down-scales your stream once you’re partnered. If you stream at 2,000 Kb/s then your viewers need to have at least that much bandwidth to watch your stream without it stuttering, skipping, or buffering.
2) I’ve seen that before on some streams. I’m not sure when that feature will be expanded to Mac OBS. Sorry!
TheHotmessVG
May 26, 2015 1:52 pmThanks AdyEndrus
1.) Good to know about non-partners not getting scaled streams. We are definitely not partnered soon and likely will not be (since we only stream once or twice a week.) Probably don’t need 2000 Kb/s and 48fps (though I love it.) I tested 1500 Kb/s and 30 fps (1080p scaled to 720p). It looks acceptably nice and should make the stream more accessible.
2.) God I hope they add this soon. I think I read somewhere on a forum where they said that the feature is in the code, but they just haven’t added a UI element for it yet.
TheHotmessVG
May 28, 2015 3:48 amJust letting you guys know that as of version 0.10.1 of Mac OBS, there is an audio delay feature for the webcam. If you click on the gear icon (“Mixer”) above the volume sliders on the main screen, that will take you to a window which will allow you to manually set your webcam’s audio offset. I set mine to 500ms, and my audio seems to be in sync now.
keldegar
Aug 10, 2015 3:23 pmYeah, I had to do an offest for my game audio. it was behind the video slightly.